There are plenty of tutorials online to create an HTML signature in Apple Mail with older versions of OS X,
and you have probably already seen one of my other tutorials on how to add HTML Signatures in
Lion,
Mountain Lion,
iOS 7,
Mavericks,
Yosemite,
El Capitan,
Sierra, or
but the process has changed ever so slightly for the new OS X High Sierra (10.13).
Here is how to do it:
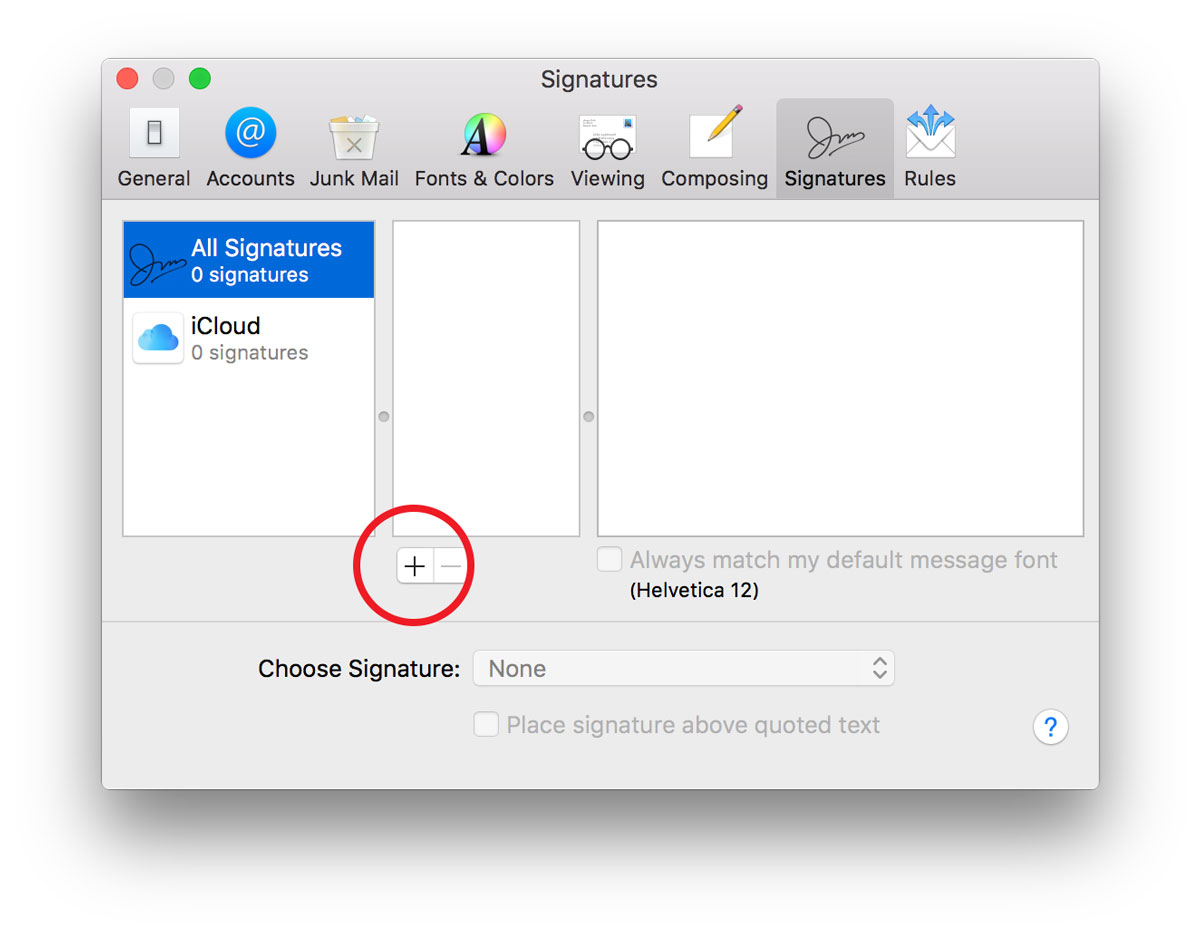
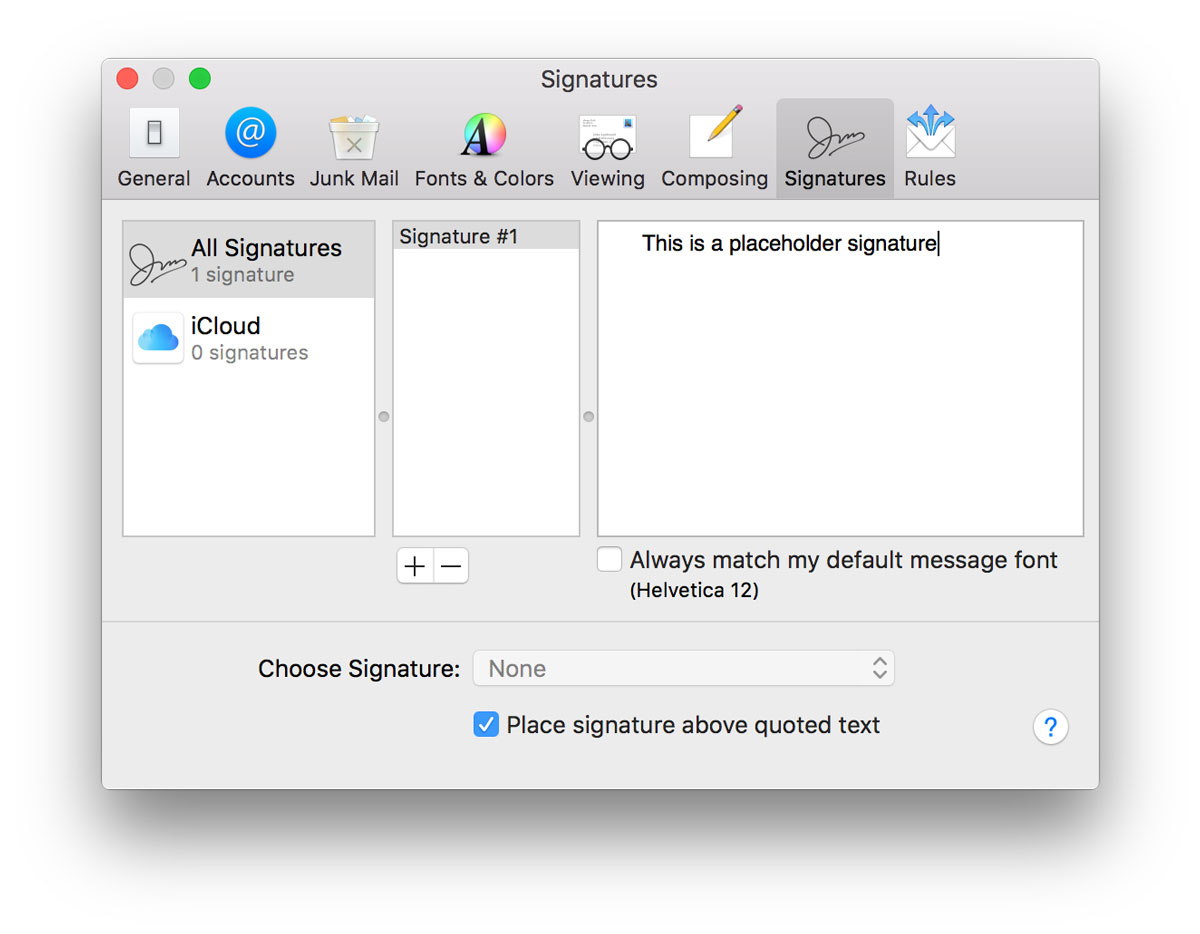
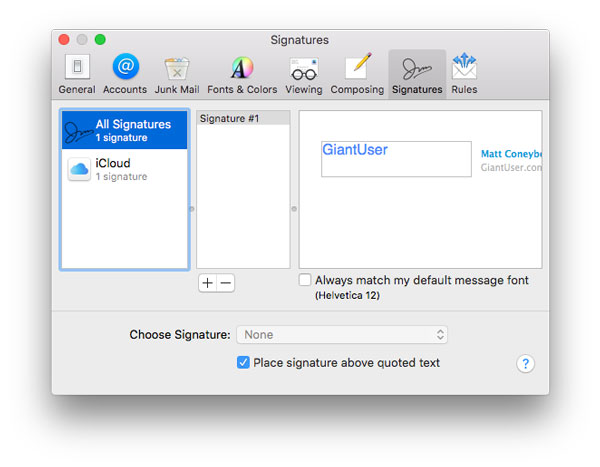
In Apple Mail, go to Preferences > Signatures and create a signature with any random content.
Name it something meaningful in the central column. You will be swapping this out later.
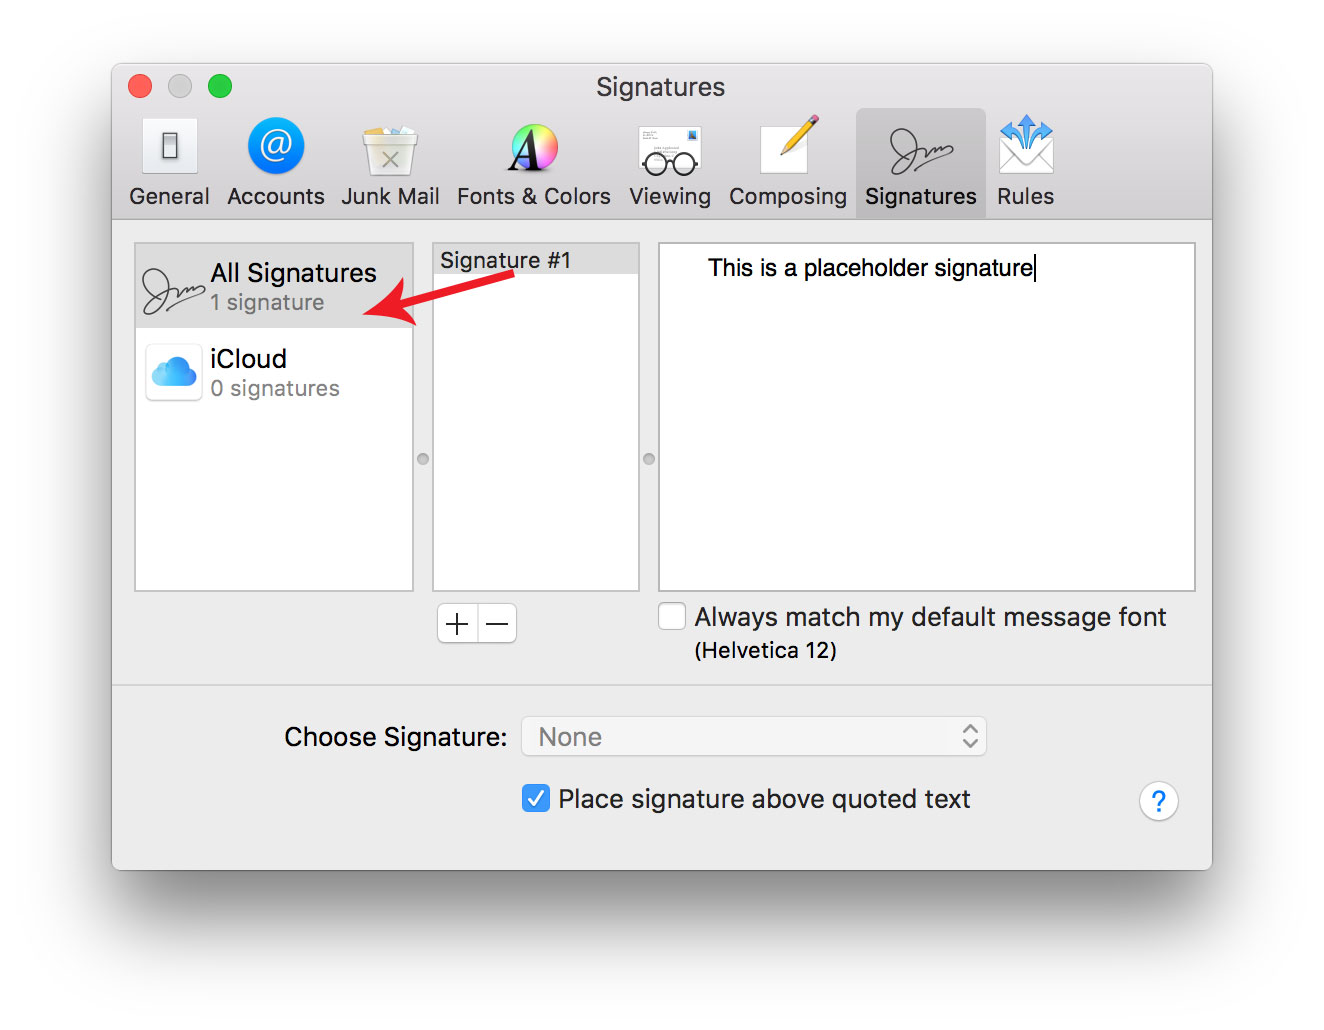
Associate the placeholder signature with one of your email accounts by dragging its name from the second column in the
Preferences > Signatures window to an email account in the first column.
Close the Preferences window to save it, then quit Apple Mail.
Write an html page inside of your favorite text editor. I use TextMate 2.
Please do NOT use Microsoft Word, Dreamweaver or any other "smart" editor as these editors
will manipulate your final code in a way which will most likely break your design for certain recipients.
The page should not have html or head tags,
should include only inline css, and should only consist of basic html elements
(div, span, img, a, etc...).
Even though many email programs now support more advanced tags, there is a still a large
percentage of people who use older versions of Outlook and other software,
and you want your signature to look great for them too.
If you need additional help with html signature design or implementation,
I have created a company called GiantUser
(it's an anagram of "signature") to do just that with very reasonable prices. Check it out!
We are going to need to locate the folder containing the placeholder signature.
Unfortunately, you are not going to be able to use Finder to get to these folders.
Apple goes to great lengths to hide these files from people as they usually contain info that is not editable by hand.
Trying to navigate through by clicking in Finder will usually lead you to your visible iCloud Drive folder with nowhere to go.
Don't worry though, I will walk you through an alternative method of getting at those files.
The files can be in 2 different places depending on whether you are using iCloud Drive or not.
You are most likely using iCloud Drive, even if you are not using an iCloud email address. Check by going to System Preferences > iCloud,
then seeing if the iCloud Drive checkbox is ticked or not.
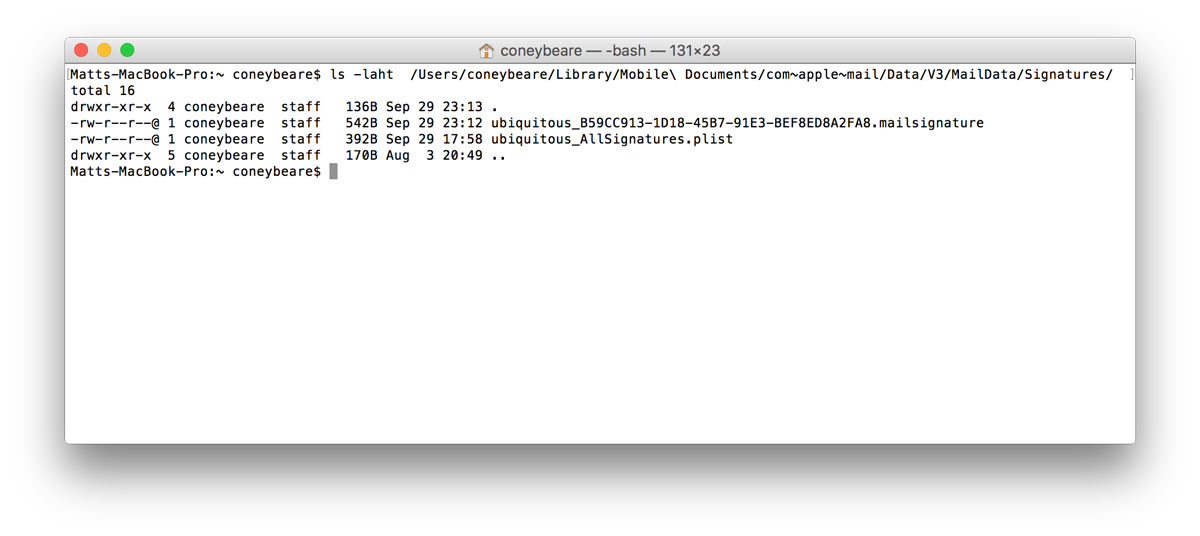
This line tells Terminal to list all the files in this directory along with some other file info, then sort it by date.
When you press enter you should see a bunch of lines, each of which corresponds to a file and some of its metadata.
Look at the right side column — the file names — and notice the ones that end in .mailsignature.
These are the files we are interested in working with.
If you get an error, make sure you pasted the line in exactly like shown on one line. If you still get an error, try the next path on the list above.
As mentioned above, we could normally use Finder to view these folders, but Apple has hidden access to them to prevent direct editing, something we wish to do here.
If you have only 1 mailsignature file, then this is most likely the placeholder file you created in step 1. If you have more than one mailsignature file in there, then you need to find
the one you created in step 1. Because this list is sorted top-down by the most recently updated, it will most likely be the top one, but you can check by opening them all and seeing ther contents.
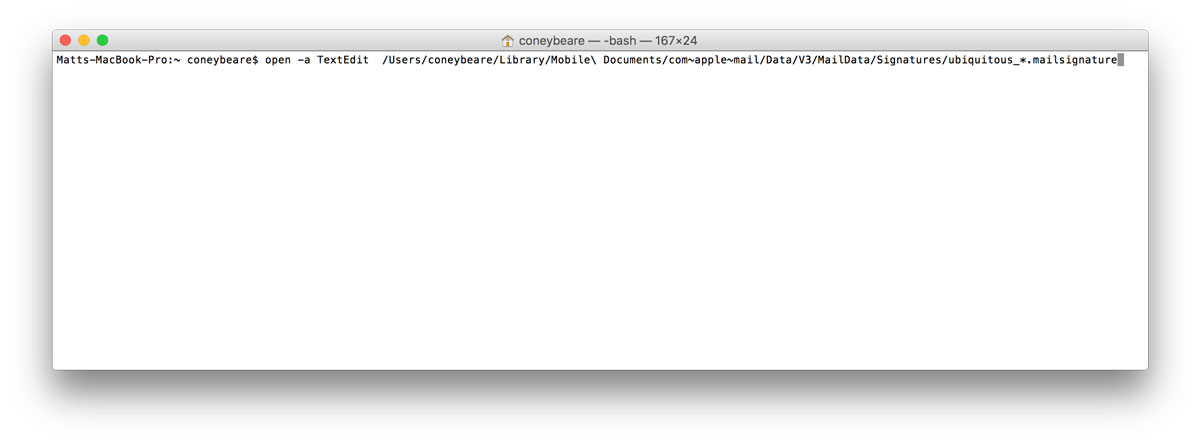
Terminal.app does not respond to double-clicking the file so how can you open the mailsignature files? You can copy/paste the following command on the keyboard, all on one line.
Using iCloud Drive:
open -a TextEdit ~/Library/Mobile\ Documents/com\~apple\~mail/Data/V4/Signatures/*.mailsignature
Not Using iCloud Drive:
open -a TextEdit ~/Library/Mail/V5/MailData/Signatures/*.mailsignature
This line tells Terminal to open all files in that directory that have a filename that ends with mailsignature, and to open them using the TextEdit application.
Once you have these files open in TextEdit, move on to next step.
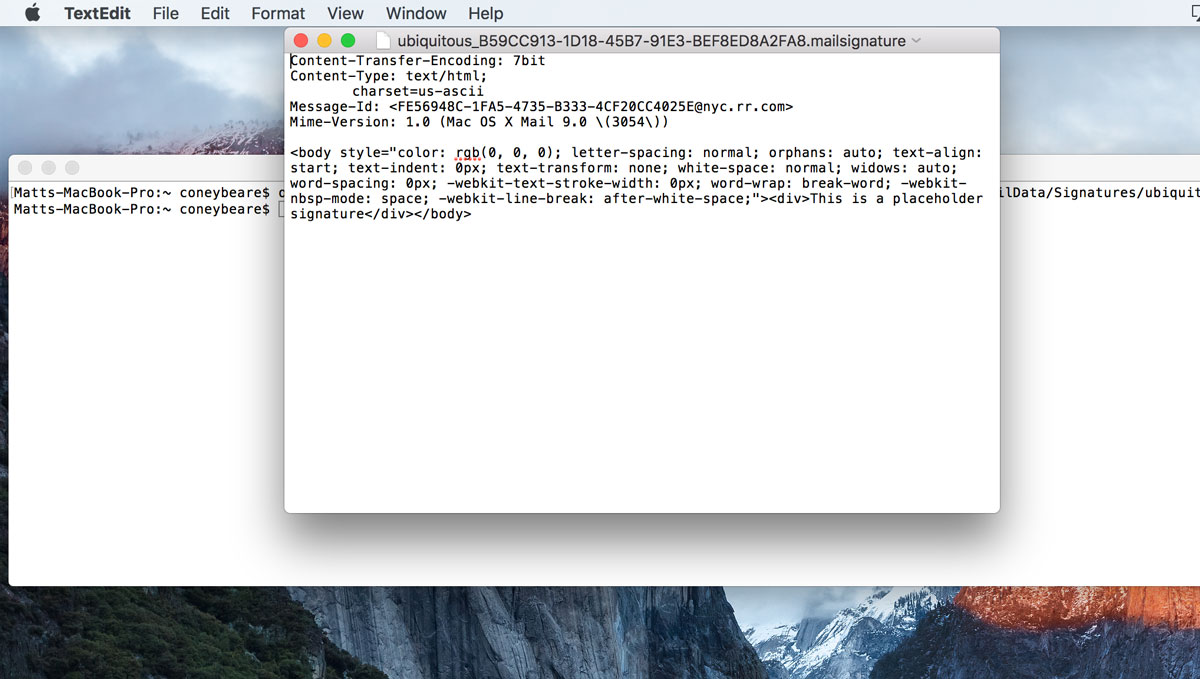
When you created a temporary placeholder signature in step 1, Mail automatically created a XXXXXXX.mailsignature file that represents it.
This placeholder now should be open in TextEdit.
If you have more than one XXXXXXX.mailsignature files open in TextEdit, we have to find the right one amongst them now.
To help ensure you have the right file, look the one you think is your placeholder in TextEdit.
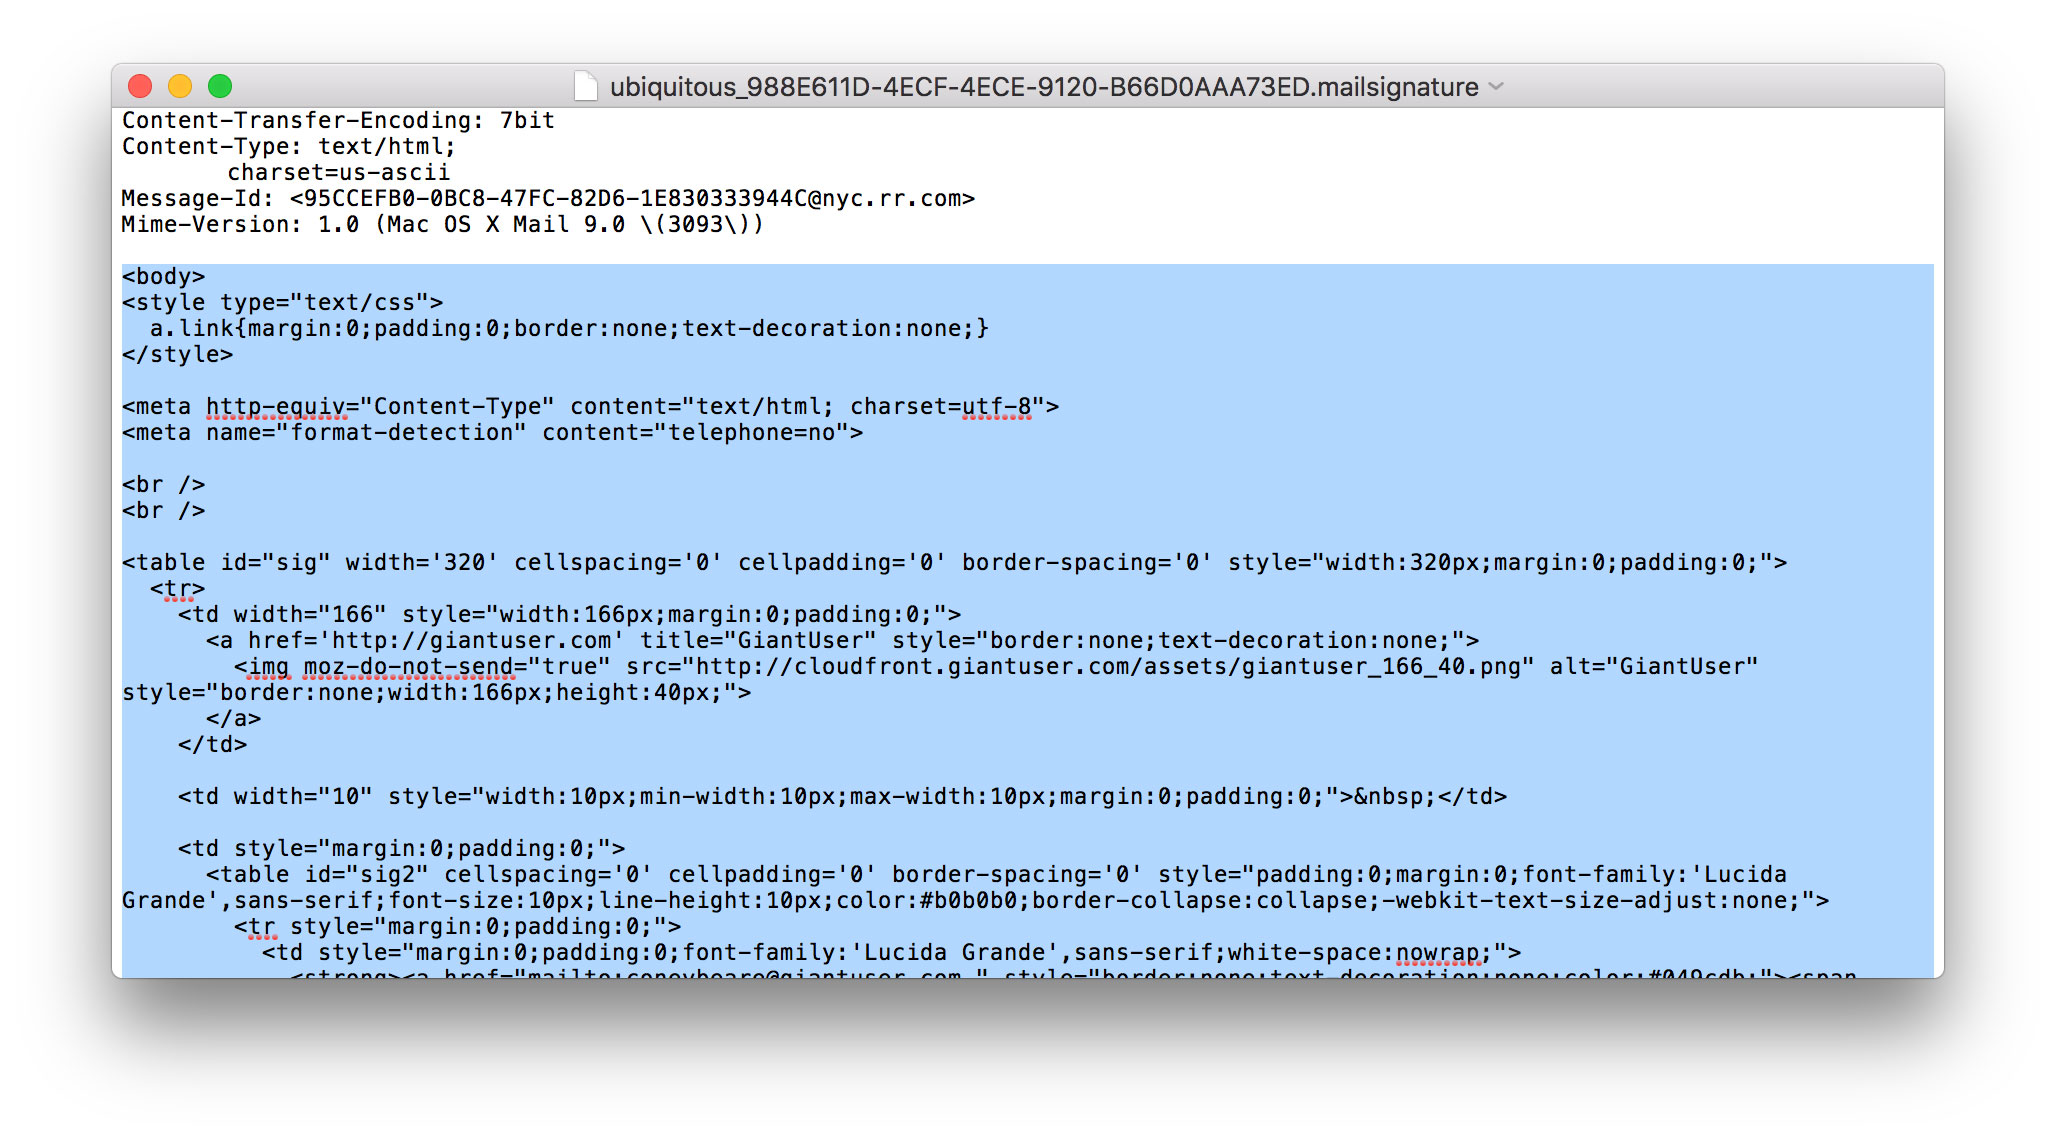
You should see the placeholder text you entered in step 1, along with other code and metadata.
Look for your placeholder text in the highlighted part shown in the image above. Here, we know we have the correct file because we can clearly see our placeholder text: "This is a placeholder."
If you cannot find the placeholder, you may still be in "edit" mode on the signature. Try closing the Mail > Preferences Window, quitting Apple Mail and opening the files using the process outlined in the previous step.
If you still cannot find the placeholder, you may need to try one of the other folders from the above step.
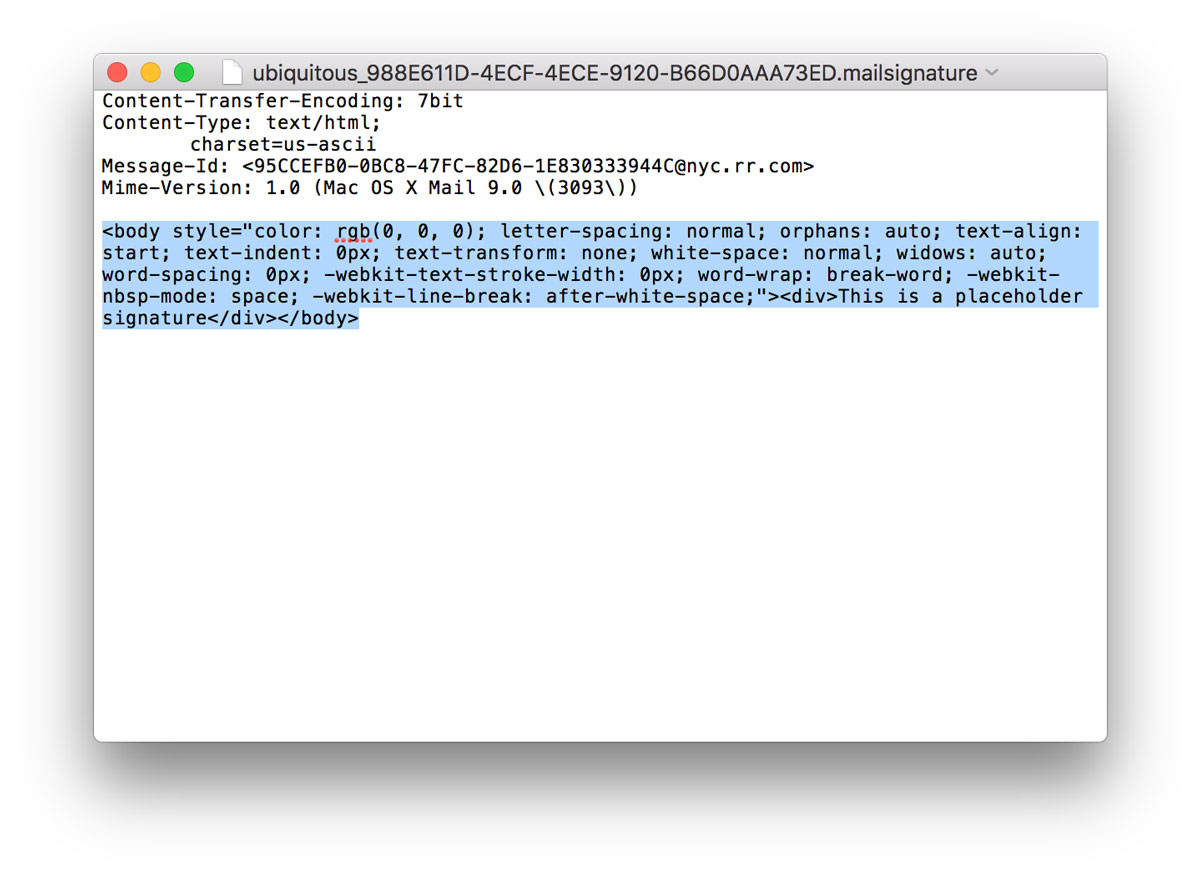
When you have located the right placeholder .mailsignature file, keep it open and close all other TextEdit windows.
Feel free to resize the window to make text editing a bit easier.
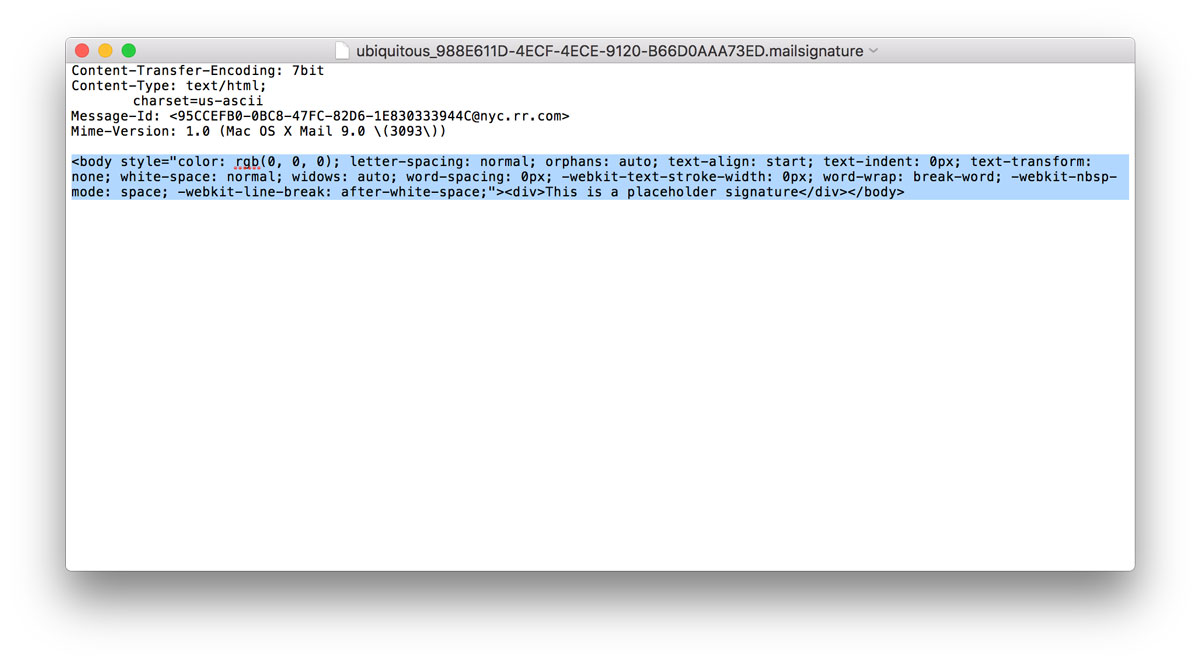
You will see a few metadata lines on the top of the file and some html code below it. Select only the placeholder code.
Keep the top metadata lines, but replace the html in the file with your own from step 2.
Save and close the file.
If you are using iCloud Drive, skip this step and proceed to the next step.
You can determine if you are using iCloud for Apple Mail by checking System Preferences > iCloud.
Still unsure? Skip this step — you can redo the steps and include this one if your signature is not working correctly at the end.
Even though you save this file, Apple Mail may use the original version and overwrite your new signature unless you lock the file.
With your text editor now closed and the file saved, go back to terminal, enter the following line, and lock all the mailsignature files in the folder.
Open Apple Mail and go back to Preferences > Signatures. If you have images in your signature,
they will will not show here in the preview, but they will show in the real signature
if the image source location is valid.
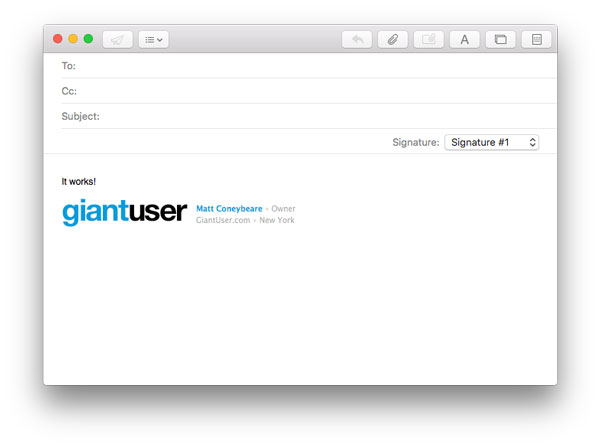
To test that it is working correctly, simply compose a new email using the account you associated this signature with in step 2,
and set the signature (right side of screen) to be the one with the name you created in step 1.
If the images show, and everything looks as it should, you have succeeded!
I'm thrilled to share that this weekend I ran the
2026 Anchorage Mayor's Marathon, my
43rd marathon overall and one I have been looking forward to for...
I'm excited to share that I have just finished my 42nd Marathon: the 2026
Myrtle Beach Marathon in Myrtle Beach, South Carolina.
A classic oceanfront ...
I'm excited to share that I have just finished my 41st Marathon: the 2026
Big Beach Marathon in Gulf Shores, Alabama.
A place usually known for its br...