
How to Make an HTML Signature in Apple Mail for Mavericks OS X 10.9
Looking for Sonoma instructions?
Looking for Ventura instructions?
Looking for Monterey instructions?
Looking for Big Sur instructions?
Looking for Catalina instructions?
Looking for Mojave instructions?
Looking for High Sierra instructions?
Looking for Sierra instructions?
Looking for El Capitan instructions?
Looking for Yosemite Instructions?
There are plenty of tutorials online to create an HTML signature in Apple Mail with older versions of OS X, and you have probably already seen my tutorial on how to add HTML Signatures in Lion or Mountain Lion, but the process has changed slightly for OS X Mavericks (10.9). Here is how to do it:
-
In Mail.app, go to
Preferences>Signaturesand create a signature with any random content. Name it something meaningful. You will be swapping this out later.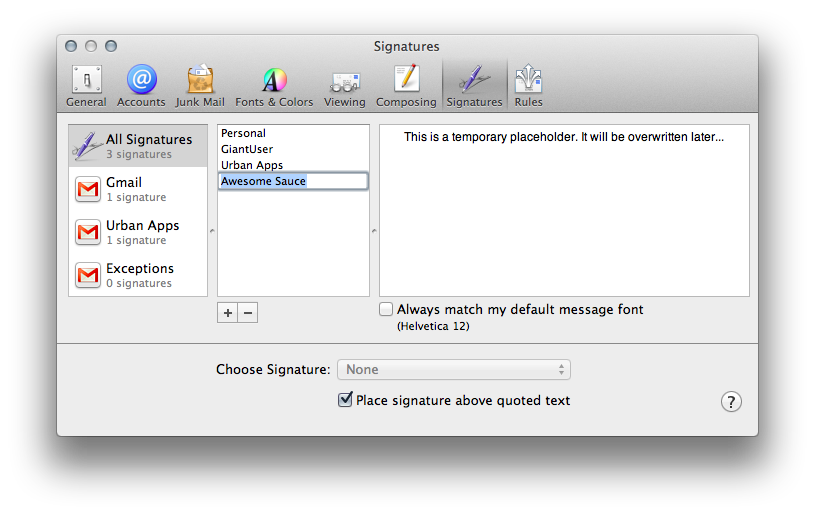
-
Write an html page inside of your favorite text editor.
I use TextMate 2.
The page should not have
html,headorbodytags, should include only inline css, and should only consist of basic html elements (div,span,img,a, etc...). Here is some example code to get you started.If you need additional help with html signature design or implementation, I have created a company called GiantUser (it's an anagram of "signature") to do just that with very reasonable prices. Check it out!
-
Open the folder containing the placeholder signature. This step differs if you are using iCloud or not.
You can determine if you are using iCloud for Mail.app by checking
System Preferences>iCloudUsing iCloud:
Open the folder to show your email signatures in Finder by holding down the
~/Library/Mobile Documents/com~apple~mail/Data/MailData/Signatures/
Not using iCloud:
~/Library/Mail/V2/MailData/Signatures/Optionkey and clicking the "Go" menu in Finder. Check here for more tips if you are having trouble opening the~/Libraryfolder.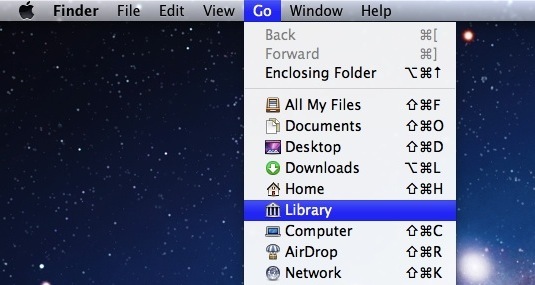
-
When you created a temporary placeholder signature in step 1, Mail automatically created a
ubiquitout_XXXXXXX.mailsignaturefile that represents it in this folder. Locate the.mailsignaturefile in the~/Libraryfolder. It will have a random name. If it is not there, you may still be in "edit" mode on the signature. Try closing theMail>PreferencesWindow. If you need help, it helps to sort the folder by "Date Modified" and look for the most recently updated one.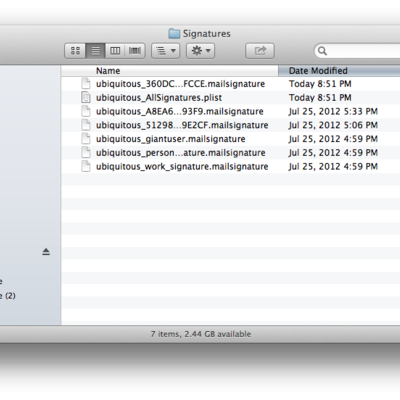
-
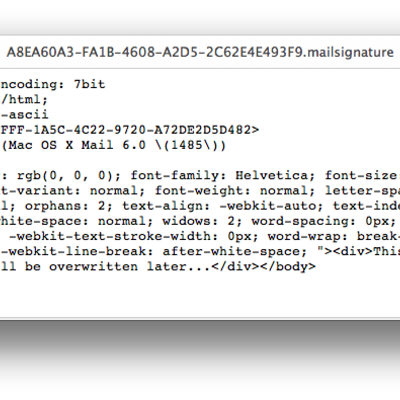
When you have located the placeholder
.mailsignaturefile, open it with your html editor. You will see a few metadata lines on the top of the file and some html code below it.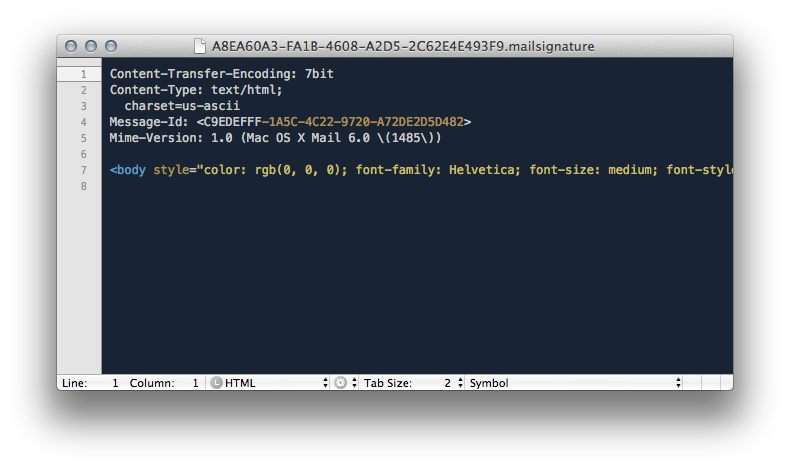
-
Keep the top metadata lines, but replace the html in the file with your own from step 2.
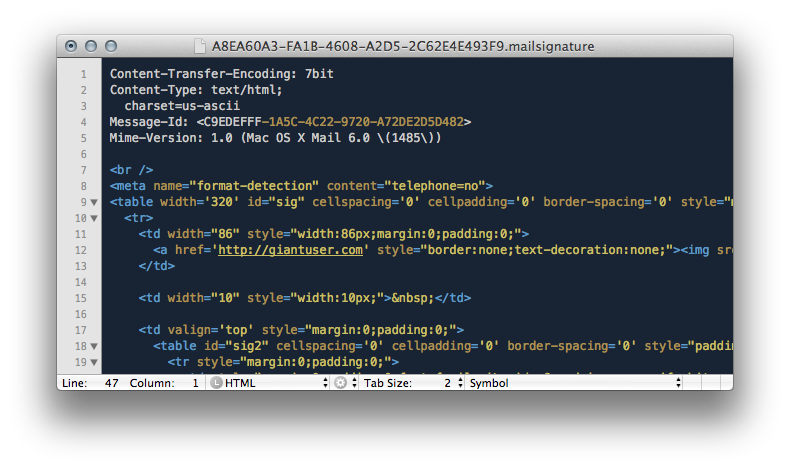
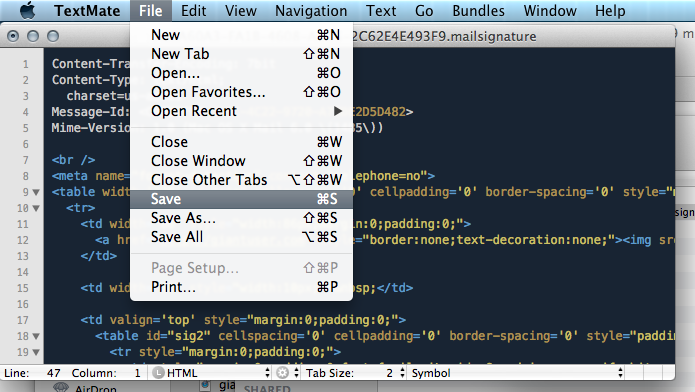
- Save the file.
-
If you are using iCloud, skip this step and proceed to Step 9.
You can determine if you are using iCloud for Mail.app by checking System Preferences > iCloud.
Still unsure? Skip this step — you can redo the steps and include this one if your signature is not working correctly at the end.
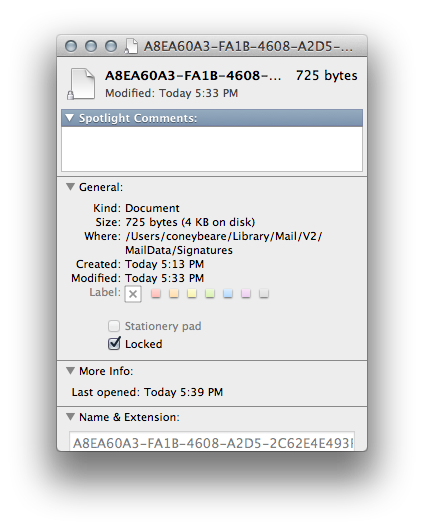
Even though you save this file, Mail.app may use the original version and overwrite your new signature unless you lock the file.
With your text editor now closed and the file saved, find it again in Finder and press command-i to bring up the info pane for the file.
On this info pane, mark the "Locked" checkbox.
-
Restart Mail.app and go to
Preferences>Signatures. If you have images in your signature, they will not show here in the preview, but they will show in the real signature if the image source location is valid.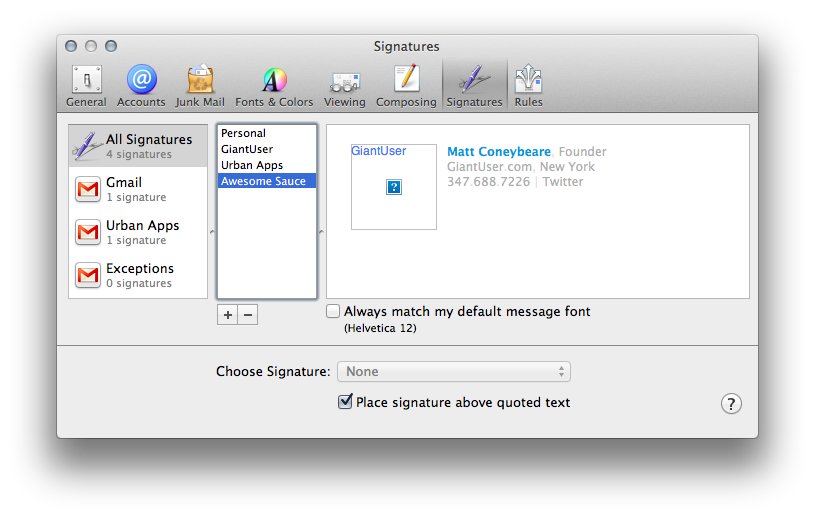
-
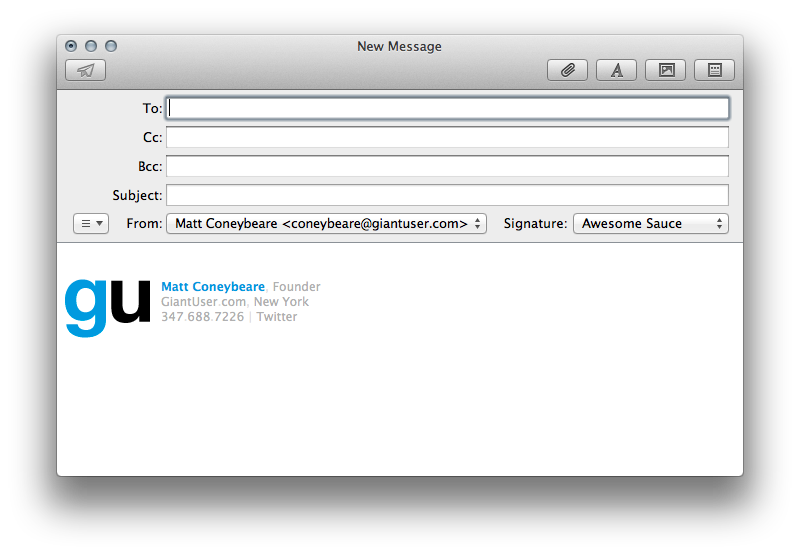
To test that it is working correctly, simply compose a new email and set the signature to be the one with the name you created in step 1.
If the images show, and everything looks as it should, you have succeeded!


Was this page helpful for you? Buy me a slice of 🍕 to say thanks!
Comments